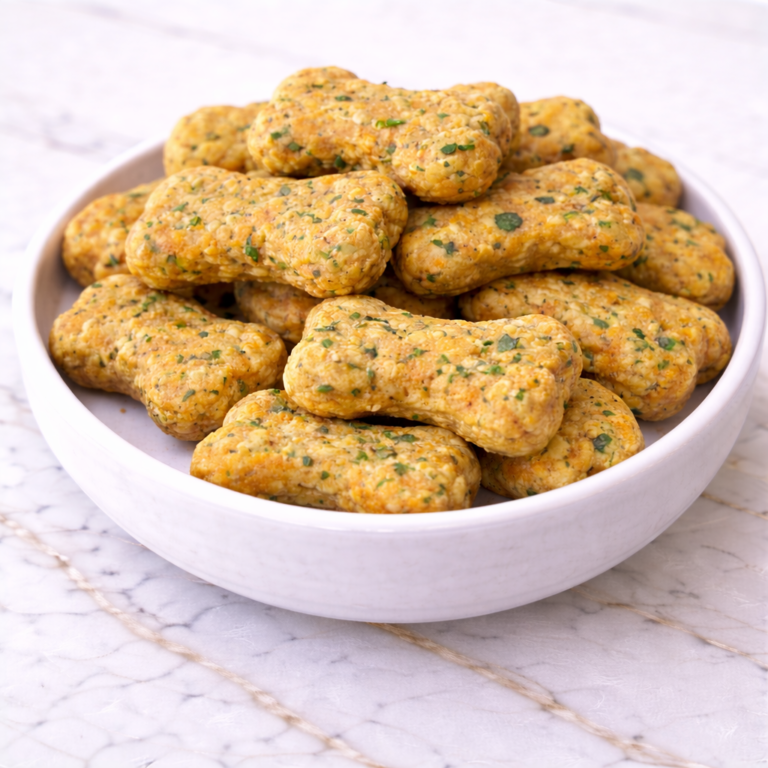
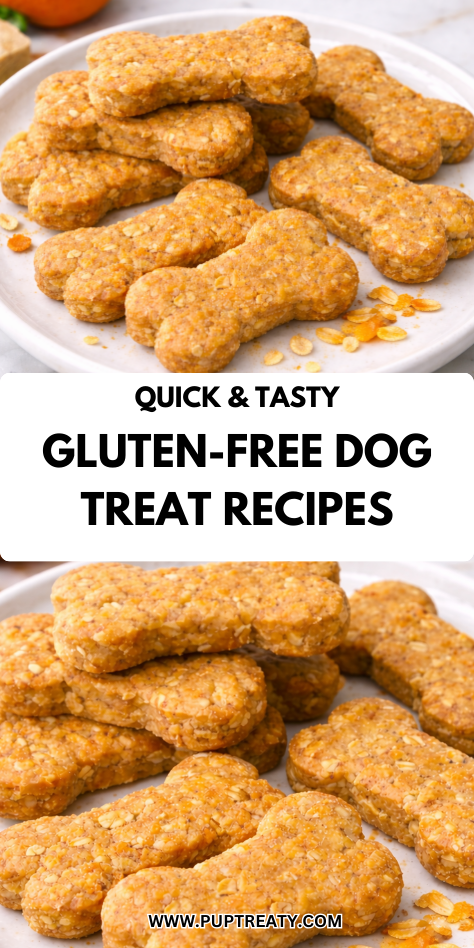
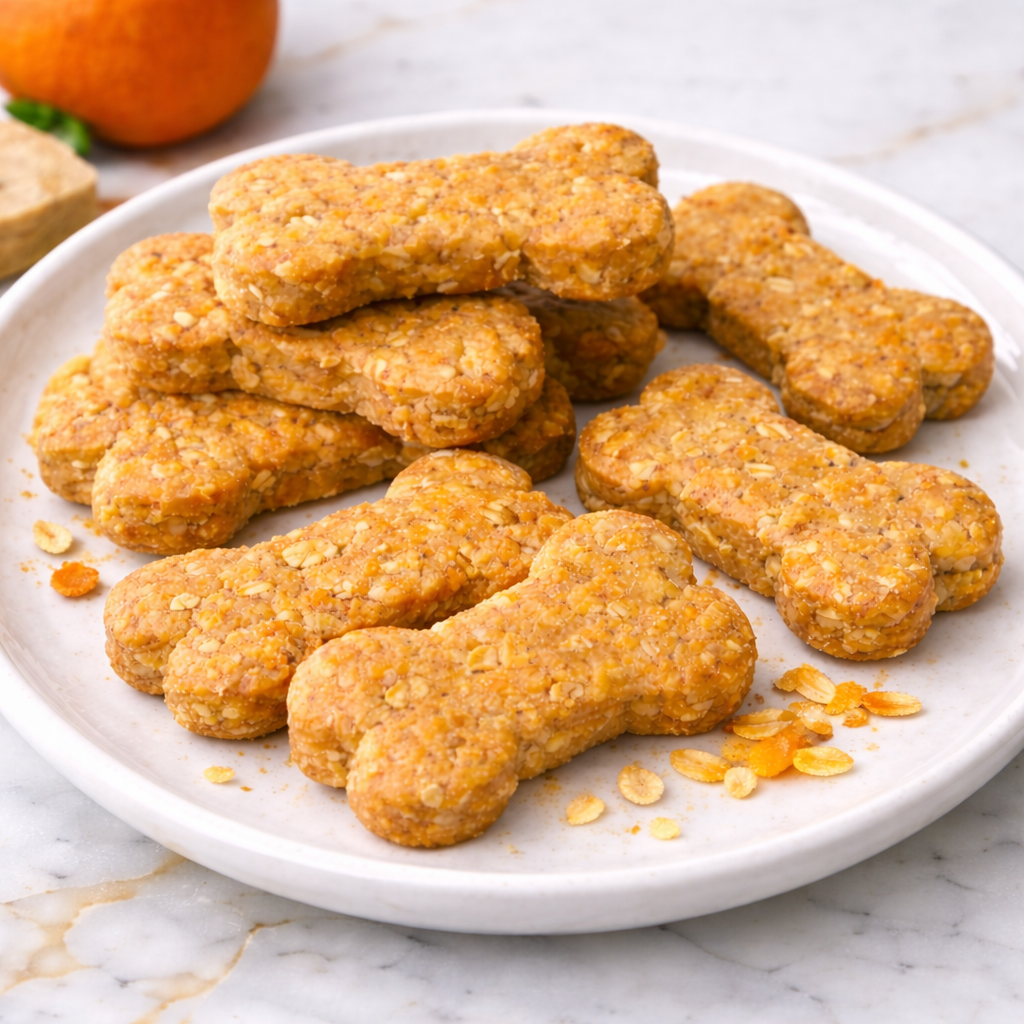
Whether your dog has a gluten sensitivity or you’re just looking for healthier, grain-free options, these Gluten-Free Dog Treats are the perfect homemade solution. Made with simple, nourishing ingredients like oat flour, pumpkin, and peanut butter, they’re gentle on sensitive stomachs and packed with dog-approved flavor.
These treats are ideal for pups with dietary restrictions, but they’re also great for any dog who enjoys a crunchy, flavorful snack.
I’ve made these for dogs with allergies, senior pups who need simple ingredients, and even for everyday treating. They’re easy to make, store well, and endlessly customizable to suit your dog’s taste and needs.
Why Your Dog Will Love This Recipe
These gluten-free treats are crunchy, flavorful, and easy to digest. Made with natural peanut butter, pumpkin, and oat flour, they offer a balance of fiber, protein, and healthy fats in every bite.
They’re great for dogs with sensitivities or anyone trying to eliminate unnecessary fillers from their dog’s diet. Your dog won’t know they’re eating something “healthy”—they’ll just know it tastes great.
What You’ll Need
- 1 cup oat flour (or finely ground rolled oats)
- 1/2 cup canned pumpkin (unsweetened, pure pumpkin)
- 1/4 cup natural peanut butter (xylitol-free)
- 1 egg
- 1/2 teaspoon ground cinnamon (optional)
- 1–2 tablespoons water (if needed)
Pro Tips
- Use certified gluten-free oats or oat flour to avoid cross-contamination.
- Avoid pumpkin pie filling—use pure canned pumpkin with no added sugar or spices.
- Roll dough evenly for uniform baking and texture.
- Adjust water only as needed—a slightly firm dough is ideal for cookie cutters.
- Store in a dry container to keep treats crispy longer.
Tools Required
- Mixing bowl
- Measuring cups and spoons
- Rolling pin
- Cookie cutters (bone, heart, or paw shapes)
- Baking sheet
- Parchment paper
- Cooling rack
Substitutions and Variations
- No pumpkin? Use mashed sweet potato or banana
- No peanut butter? Use sunflower seed butter or plain mashed peas
- Egg-free: Replace with 1/4 cup unsweetened applesauce or flax egg (1 tbsp ground flax + 3 tbsp water)
- Flour alternatives: Use chickpea flour, coconut flour (with extra moisture), or rice flour
- Add-ins: Mix in shredded carrots, finely chopped parsley, or blueberries for variety
Make Ahead Tips
You can prepare the dough 1–2 days in advance and store it in the refrigerator until ready to bake. You can also shape the dough, freeze it on a tray, and transfer the frozen shapes to a freezer-safe bag. Bake directly from frozen—just add a few extra minutes to the baking time.
Finished treats also freeze well and are perfect for making in large batches.
Instructions
Step 1: Preheat and Prep
Preheat your oven to 350°F (175°C). Line a baking sheet with parchment paper.
Step 2: Mix Wet Ingredients
In a medium bowl, combine the pumpkin, peanut butter, and egg. Stir until smooth and fully mixed.
Step 3: Add Dry Ingredients
Add oat flour and optional cinnamon to the wet ingredients. Stir to combine. If needed, add water 1 tablespoon at a time until a firm dough forms.
Step 4: Roll and Cut
Lightly flour a clean surface with oat flour. Roll out the dough to about 1/4 inch thickness. Cut into shapes using cookie cutters.
Step 5: Bake
Place treats on the prepared baking sheet and bake for 18–22 minutes, or until golden brown and firm to the touch.
Step 6: Cool and Serve
Transfer to a wire rack and let cool completely before serving or storing.
Serving Suggestions
- Serve as daily treats or training rewards
- Use small cutters for bite-size training pieces
- Pair with a spoonful of pumpkin or yogurt for a fun snack
- Add to doggy gift bags for birthdays or holidays
- Use for enrichment toys or treat-dispensing balls
Allergy-Friendly Substitutions
- Grain-free: Swap oat flour for coconut or chickpea flour (adjust moisture accordingly)
- Nut-free: Use mashed banana or plain pumpkin instead of nut butter
- Dairy-free: This recipe is naturally dairy-free
- Egg-free: Use a flax egg or applesauce to bind
- Low-fat: Reduce or skip the nut butter and add more pumpkin or a bit of water
Leftovers and Storage
These treats store well when kept dry:
- Room temp: Store in an airtight container for up to 1 week
- Refrigerator: Extend freshness up to 2 weeks
- Freezer: Freeze in a zip-top bag for up to 2 months—just thaw before serving
- Re-crisping: If they soften, pop them in a 300°F oven for 5–7 minutes to regain crunch
Always store in a cool, dry place. Adding a food-safe desiccant packet or dry rice pouch to the container can help absorb excess moisture.
Nutrition & Benefits
These gluten-free dog treats are full of beneficial nutrients. Pumpkin is great for digestion and rich in vitamins A and C.
Peanut butter adds protein and healthy fats to keep your dog satisfied, and oat flour is a gentle, gluten-free option that provides lasting energy and fiber. The combination is easy on the stomach while still tasting like a real reward.
By making these treats yourself, you’re avoiding preservatives, artificial colors, and unnecessary fillers often found in store-bought options—giving your dog a healthier, homemade alternative.
Recipe FAQ
Q: Can I use store-bought oat flour?
A: Yes, or you can grind your own oats in a blender until fine.
Q: Are these okay for dogs with grain allergies?
A: Oats are technically a grain but are often well tolerated. If unsure, swap with coconut flour or chickpea flour.
Q: Can I make these into soft treats?
A: Yes—bake for 12–14 minutes for a softer, chewier texture.
Q: Can I shape these by hand?
A: Absolutely! Roll into small balls and flatten with a fork like peanut butter cookies.
Q: How many treats does this recipe make?
A: Around 30 small treats, depending on cutter size and dough thickness.
Recipe Wrap-Up
These Gluten-Free Dog Treats are easy to make, allergy-conscious, and full of flavor your dog will love.
Whether you’re baking for a dog with sensitivities or simply want to offer a healthier, homemade snack, this recipe gives you a satisfying, customizable option.
With just a few simple ingredients and 30 minutes of your time, you can have a jar full of crunchy, nutritious treats that you’ll feel great about giving your pup.