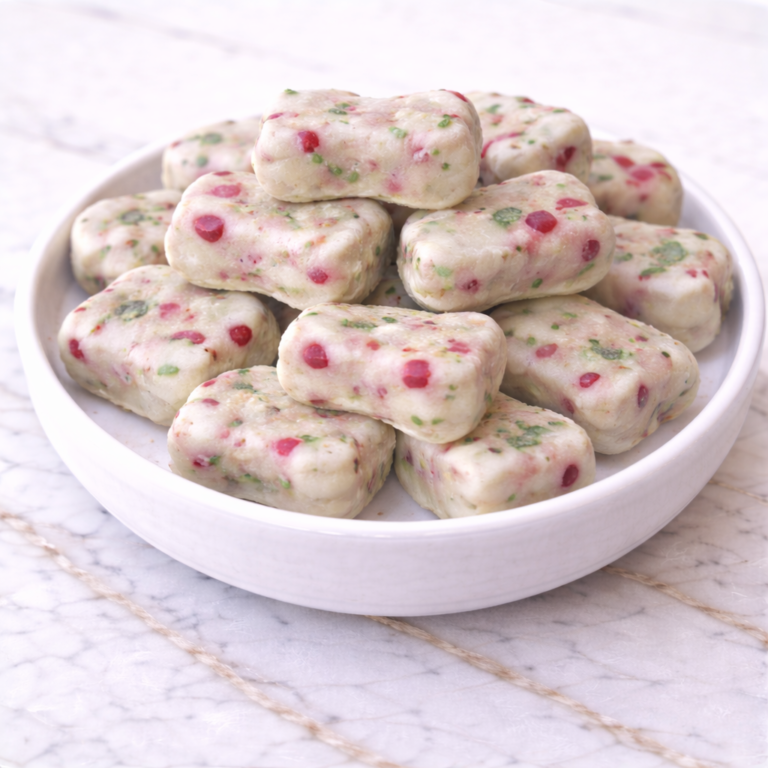
Making homemade dog treats has a way of slowing everything down and bringing intention back into the kitchen. When I bake Homemade Dog Treats with Peanut Butter, the process feels steady and familiar, focused more on care than convenience.
There is something deeply satisfying about using simple ingredients to create something meaningful for a dog who is part of everyday life.
This recipe became a regular favorite because peanut butter is such a recognizable and comforting flavor for many dogs.
It is one of those ingredients that immediately gets their attention without needing anything fancy added to it. Turning it into a baked treat feels special while still staying grounded and practical.
I often make these treats for everyday rewards, training moments, or small celebrations that do not call for a full cake.
They are easy to portion, store well, and feel appropriate for regular use when given thoughtfully. The act of baking them becomes a quiet ritual of care.
Homemade Dog Treats with Peanut Butter fit naturally into a mindful approach to dog care. They can be made in batches, adjusted for size, and stored without stress. More than anything, they reflect the steady bond built through routine, trust, and small acts of kindness.
Why This Recipe Is Great for Your Dog
This recipe uses a short list of familiar, dog-friendly ingredients that many owners already trust. Peanut butter adds flavor and aroma without relying on added sugars or artificial ingredients.
Keeping the ingredient list simple helps make the recipe approachable.
The texture of these treats is firm enough to hold their shape while still being easy to chew. They can be baked softer or crunchier depending on preference. This flexibility makes them suitable for dogs of different ages.
Preparation is straightforward and forgiving. The steps do not require advanced baking skills or special equipment.
That ease makes the recipe accessible even for people baking dog treats for the first time.
Dogs often enjoy the familiar smell and taste of peanut butter. The flavor is rich but not overwhelming. This balance helps the treats feel rewarding without being excessive.
Ingredients
- 2½ cups oat flour
- ½ cup natural peanut butter, unsweetened
- 2 large eggs
- ½ cup unsweetened applesauce
- ¼ cup coconut oil, melted
- ¼ cup water
Tools You’ll Need
- Mixing bowls
- Measuring cups
- Measuring spoons
- Whisk or fork
- Silicone spatula
- Rolling pin
- Cookie cutters or knife
- Baking sheet
- Parchment paper
- Cooling rack
Pro Tips
Always choose natural peanut butter with no added sugars or sweeteners. Avoid any product containing xylitol. Careful label reading is essential for safety.
Allow the melted coconut oil to cool slightly before mixing. Hot oil can affect egg texture. Cooling helps everything blend smoothly.
If the dough feels sticky, lightly dust the surface with oat flour. This makes rolling and cutting easier. Avoid adding too much extra flour.
Adjust baking time based on desired texture. Shorter baking creates softer treats, while longer baking results in crunchier ones. Watch closely near the end.
Let the treats cool completely before storing. Warm treats can trap moisture. Cooling helps maintain freshness and structure.
How Long This Recipe Takes
Preparation time for these treats is calm and manageable. Mixing the dough, rolling it out, and cutting shapes usually takes about thirty minutes. This allows for a relaxed pace.
Baking time typically ranges from twenty to thirty minutes depending on thickness and desired texture. Ovens vary, so checking frequently is important. Treats should feel firm when done.
Cooling time should not be skipped. Allow at least thirty minutes for treats to cool completely. From start to finish, expect about one hour and thirty minutes.
Make-Ahead Tips
These treats are ideal for make-ahead preparation. Baking a batch in advance ensures you always have rewards ready. This is especially helpful for training routines.
Once cooled, treats can be stored in an airtight container at room temperature for short periods. For longer freshness, refrigeration works well. Always inspect before serving.
Freezing is also an option for long-term storage. Freeze treats in a single layer before transferring to a container. Thaw at room temperature before serving.
Avoid stacking warm treats in storage. Trapped heat can cause moisture buildup. Cooling fully protects texture and shelf life.
Step-by-Step Instructions
Step 1: Preheat the Oven
Preheat your oven to 350°F (175°C). Line a baking sheet with parchment paper. Set aside while preparing the dough.
Step 2: Mix Wet Ingredients
In a large mixing bowl, combine peanut butter, eggs, applesauce, and melted coconut oil. Whisk or stir until smooth and evenly blended.
Step 3: Add Flour
Gradually add the oat flour to the wet mixture. Stir gently until a dough begins to form. The dough should be thick but workable.
Step 4: Adjust Dough
Add water gradually until the dough comes together smoothly. The dough should not be sticky or crumbly. Adjust slowly as needed.
Step 5: Roll Out Dough
Lightly flour a clean surface with oat flour. Roll out the dough to about one-quarter inch thickness. Keep thickness even for consistent baking.
Step 6: Cut Treats
Use cookie cutters or a knife to cut the dough into shapes. Place the treats on the prepared baking sheet, leaving a small amount of space between them.
Step 7: Bake
Bake for twenty to thirty minutes depending on desired texture. Treats should feel firm and lightly golden around the edges. Avoid overbaking.
Step 8: Cool Completely
Remove the treats from the oven and transfer them to a cooling rack. Allow them to cool completely before serving or storing.
Nutritional Notes for Dogs
These treats are designed as occasional rewards rather than daily food. They add enjoyment and variety without replacing balanced meals. Treats should always be given thoughtfully.
The ingredients provide carbohydrates, fats, and protein in moderate amounts. Peanut butter contributes flavor and richness, while oats provide structure. The overall profile remains familiar and gentle.
Every dog responds differently to new treats. Introduce these treats gradually and observe tolerance. Portion size should reflect your dog’s size and activity level.
Ingredient Swaps and Variations
- Grain-free option: Use chickpea flour instead of oat flour if appropriate.
- Egg-free: Replace eggs with additional applesauce, noting texture may change.
- Flavor variation: Add a small amount of mashed banana for subtle sweetness.
- Texture change: Bake longer for crunchier treats or shorter for softer ones.
- Mini treats: Roll thinner and cut smaller shapes for training rewards.
How to Serve Safely
Serve treats in portions appropriate for your dog’s size. Small dogs may need only one small piece. Larger dogs can enjoy more with moderation.
Always supervise during treat time. Observe how your dog handles the texture, especially with crunchier treats. Adjust size if needed.
These treats work well for training, enrichment, or occasional rewards. They are not intended to replace meals. Treats should complement regular feeding.
Balance treat intake throughout the day. Avoid offering too many treats close together. Consistency supports healthy routines.
Common Mistakes to Avoid
Using sweetened peanut butter can make the treats unsafe. Always choose natural varieties. Label awareness is critical.
Adding too much flour can make the treats dry. Add flour gradually and stop once the dough is workable. Texture matters.
Overbaking can create very hard treats. Monitor closely toward the end of baking. Slight firmness is enough.
Skipping cooling time can lead to moisture buildup in storage. Always cool fully before storing. Patience improves results.
Improper storage can reduce freshness. Always use airtight containers. Proper storage protects quality.
Storage and Freshness Tips
Store treats in an airtight container at room temperature for up to five days. Refrigeration extends freshness up to two weeks. Inspect before serving.
Frozen treats can last up to three months. Label containers with dates. Thaw at room temperature before serving.
Signs of spoilage include unusual odor, visible mold, or excess moisture. Discard if anything seems off. Safety always comes first.
Avoid mixing fresh treats with older ones in storage. Rotate batches to maintain freshness. Good organization helps.
FAQs
Can puppies eat peanut butter dog treats
Puppies can have very small portions if all ingredients are familiar. Introduce slowly and supervise. Moderation is important.
How often can I give these treats
These treats can be given occasionally as rewards. They should not be fed daily in large amounts. Balance supports healthy routines.
Is peanut butter safe for dogs
Peanut butter is safe when unsweetened and free of xylitol. Always read labels carefully. Use in moderation.
Can I make these treats crunchy
Yes, bake them longer at a lower temperature. Allow them to dry in the oven after baking. Crunchiness depends on time and thickness.
Do these treats replace meals
No, these treats are supplemental only. Regular meals should remain the primary nutrition source. Treats add enrichment.
Can I use cookie cutters
Cookie cutters work very well for this dough. Simple shapes are easiest. Uniform size helps with even baking.
Can humans eat these treats
The ingredients are dog-safe, but the recipe is designed for dogs. Flavor is mild and unsweetened. It is best reserved for pets.
Ready to Bake a Classic, Comforting Treat
Homemade Dog Treats with Peanut Butter are a simple, reliable way to show care for your dog through everyday moments. With familiar ingredients, a straightforward baking process, and flexible storage options, they fit naturally into routine life.
Whether baked for training rewards, quiet enrichment, or thoughtful treats, these biscuits reflect the steady bond built through intention, consistency, and love.